Although most simple programs are easy to write using procedural programming, Arduino classes are more efficient and easier to read as the code and functions become more complex.
The Arduino programming language is a subset of C & C++, which allows you to use OOP features, such as classes.
We’ll show you how to use these constructs in a project involving blinking LEDs. Take a look!
What Is a Class in OOP
A class is a template that defines the variables and methods of a specific object.
So in object-oriented programming, you can call an instance of a class (object) that contains actual values, not variables.
In Arduino, classes are like libraries because they let you reuse code instead of typing the same thing multiple times.
So they make the code modular, reusable, and readable.
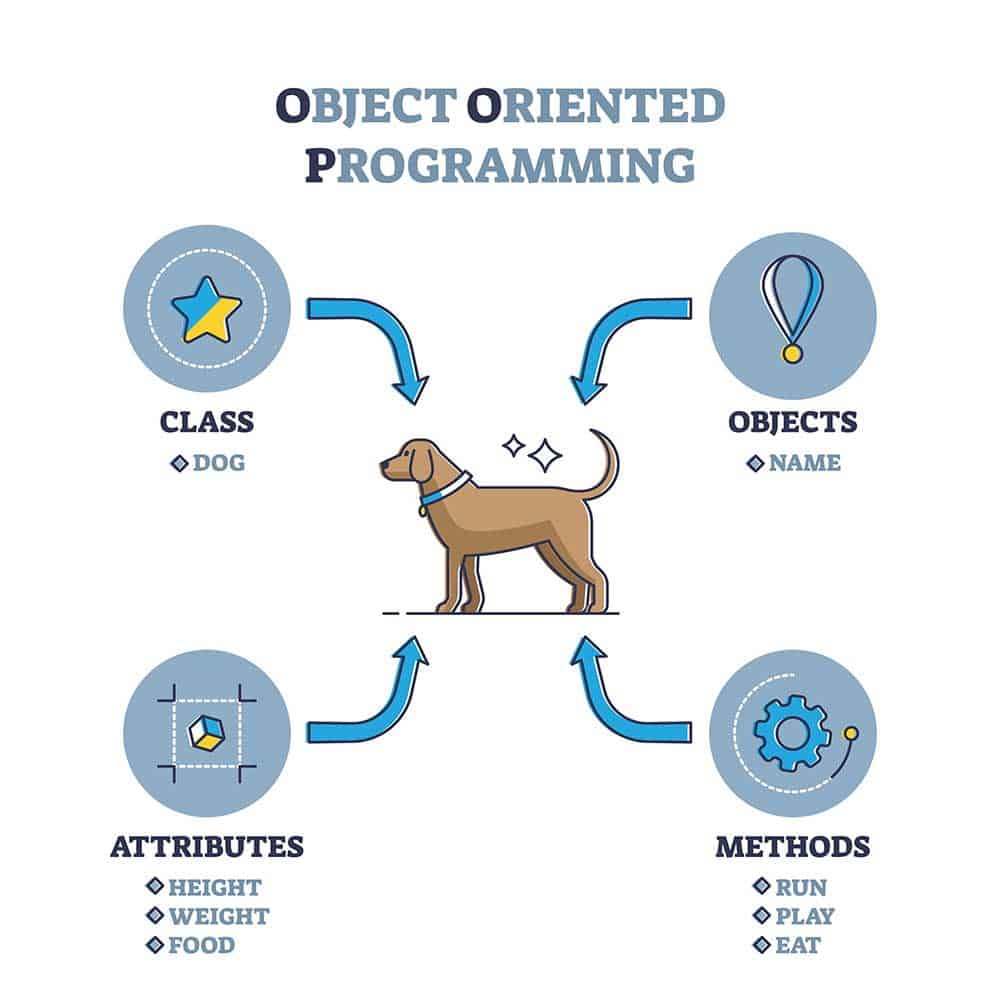
An infographic that simplifies the concept of OOP
Think of it this way. If you want to create 50 documents having the same margins, spacing, font, and header, it would be easier to have a template with these settings as the bases for typing all documents.
You would only have to type in the text, save the copy as a separate file, then repeat the process for the others.
Classes are equivalent to templates that hold the code you want to reuse several times in your project.
On the other hand, objects allow you to access the variables and functions in that class to pass in actual values and get outputs.
LED Blinking Project
Here’s the component list for this project.
- Arduino UNO board
- Two LEDs (red and green)
- Two 220Ω resistors
- Breadboard
- Jumper wires
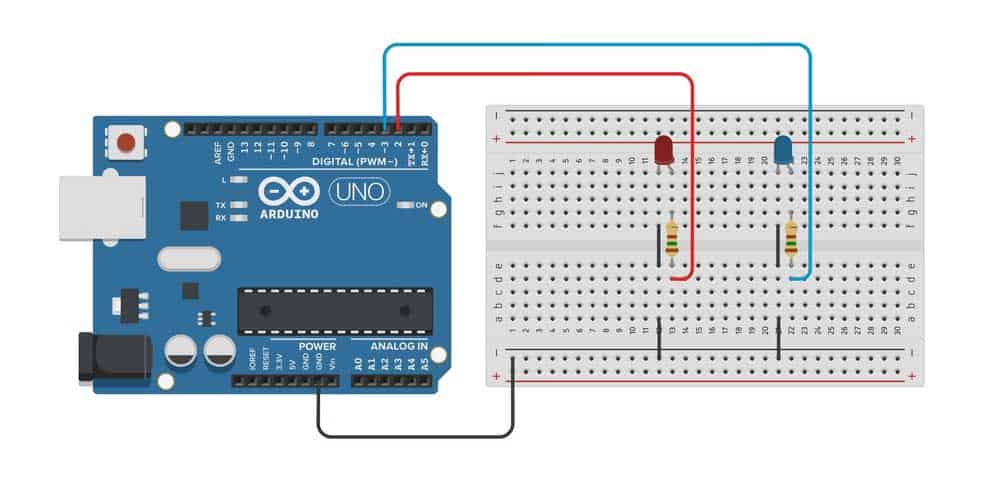
Connect these components as shown below.

An electronic circuit diagram for the Arduino LED blinking project
Arduino Code for Blinking LEDs Without Using Classes

Open the Arduino IDE, type the code above, and run it on your board.
The green LED should glow for two seconds, then turn off for two seconds, followed by the red LED turning on for one second, then off for a second.
This sequence of events should occur continuously.
Code Explanation
We begin by declaring the red and green LED variables that connect to the GPIO pins 10 and 11, respectively.
Next, we set the pin mode as output in the setup section, then blink the green and red LEDs in the loop function after two and one seconds, respectively.
The numbers 1000 and 2000 are milliseconds, translating to one and two seconds.
Arduino Code for Blinking LEDs Using Classes
The code above is lengthy for a function as simple as blinking two LEDs. Let’s look at how to shorten it using classes and their instances (objects).
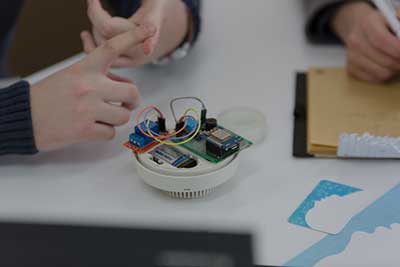
A basic LED blinking project using an Arduino UNO board
First, we’ll have to create a source and header file, then use objects in the sketch file to access functions in the classes. Let’s look at this complete code step by step.
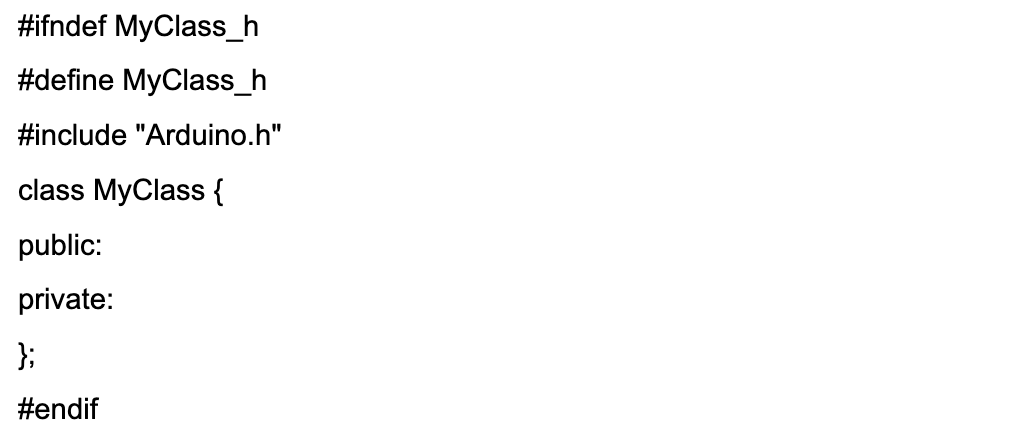
Header File
Always handle the class declaration and list the variables & functions used in the classes in the header file.
The first piece of code should be the include guard, a construct that prevents program errors caused by double inclusion.
We’ll name the class header file “MyClass.” You must save it with the .h extension.
Ifndef and define label the header file, and they must have an _h at the end.
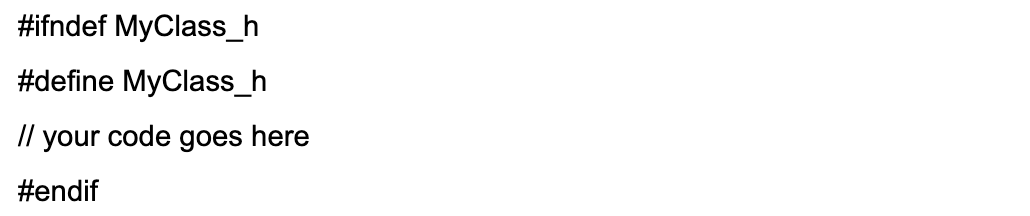
After that, include the core Arduino library file (Arduino. h) to give access to all Arduino’s built-in functions.

Next, define the class with curly brackets to provide the space for writing the class code to access using objects.

You can define variables or functions as private or public to determine their accessibility.
Private variables and functions are only accessible within the class, while public variables and functions are accessible from the sketch.
Also, each class must have a constructor (with the same class name) to define what should happen when you create an object.
Although we’ll write the constructor code in the source file, we have to declare it in the header, and it needs to be publicly accessible to get to it from the sketch.

Since we are dealing with two LEDs connected to output pin modes, the constructor functions in the source files will take integers (GPIO-pin numbers) as the initial parameters.
So we’ll declare an integer variable as the constructor’s argument in the parenthesis.
The next step is to declare the function to blink the LEDs, and it’ll be a void function because it returns no value. Let’s call it led blinking.

We will pass a variable to the led blinking function to control the blinking speed. This variable will define the delay between blinking.

The ledBlinking function needs the Arduino-pin numbers connected to power the LEDs, so you must declare a variable for them.
This variable can be private because you’ll only need it in this class.
Although unnecessary, the naming convention for private class variables is to have an underscore at the front, followed by the name.

That’s it for the header file.
Source File
This file hosts the code for all the LED functions and defines what the objects will do. It should have a similar name to the header but with a .cpp extension.
Begin by including the Arduino.h library.
Next is the MyClass header file created above, followed by the constructor definition (MyClass).
Any object created in the sketch will execute the code enclosed in the constructor’s parenthesis.

The two colons in the constructor’s definition form the scope resolution operator.
Objects created in this class will refer to the Arduino pins connected to the two LEDs, and you’ll have to set each pin as an output when you create an LED object.
But first, you’ll have to pass the contact-pin number variable.

After that, set the pin mode in the constructor and pass the “pin” variable.

Next, assign the private pin variable in the header file to the public pin variable defined in the MyClass constructor.

After that, we’ll write the function for blinking the LEDs.
It will have the return type followed by the class it belongs to (MyClass), the scope resolution operator and the function name declared in the header file.

Remember, the led blinking function has a parameter for the LED blinking duration. So we’ll include it here.

Next, write the code to blink the LEDs.

This code digitally sets the private pin variable to high.
The constructor sets the privately accessible pin to a public variable, meaning the LED object will store the publicly accessible pin variable before passing it to the constructor.
So the digitalWrite function will access the private pin variable as its parameter.
As for the delay function, we’ll give it the blink rate parameter, which we’ll define in the sketch, then digitally set the private pin variable to low to turn off the LEDs.
Sketch File
Begin by including the MyClass header file, then create objects with integer parameters (to match the constructor in the source file).
In this case, we’ll create redLED and greenLED class objects.

These parameters match the Arduino GPIO-pin numbers.
After that, write the void loop function, where we’ll blink the green and red LEDs by calling the led blinking function using the objects above and parsing the blinking rate/speed as the argument.

That’s it. This code should flash the green LED after two seconds, then turn the red LED on and off after one second continuously.
Arduino Classes (Arduino OOP) Limitations
- Exceptions are unavailable
- The C++ Standard Template Library (STL) is unavailable natively, but you can use other external libraries to get the functions provided by this library.
Wrap Up
Although it might seem more challenging to create the class files and write the class code, using Arduino Object Oriented Programming (classes) makes the final code simpler to understand and more efficient.
But you’ll most likely notice the benefits of reusability as the code becomes more complex.
That’s it for this article! Contact us if you encounter issues setting up this project or need further clarification when using Arduino classes.