The Arduino wire library helps you access all the microcontroller’s I2C serial communication bus functionalities.
But given its specific role in enabling I2C communications, why don’t we refer to it as the I2C library?
If you have this or related queries, we’ll give you elaborate solutions by the end of this discussion. So let us get started.
Table of Contents
- The Arduino Wire Library
- What is I2C?
- Arduino I2C Pins
- Location of TWI pins in different Arduino Boards
- Arduino Wire Library Functions – Acting as Master
- Arduino Wire Library Functions – Acting As an enslaved person
- I2C Interfacing Diagram
- Two-way communication between two Arduino using I2C
- Summary
The Arduino Wire Library
Like any other Arduino Library, this is a set of files whose specific role is facilitating communication with external interfaces.
You can locate the files from the ../Arduino/libraries/Wire directory.
So why is it an Arduino wire library and not an I2C one?
The reason is that Atmel, the Arduino board’s manufacturer, features a two-wire interface (TWI), the company’s version of I2C.
The library is vast with an extensive array of files, although the main ones that are fundamental to its operation are the following:
- .\utility\twi.h
- .\Wire.h
- .\utility\twi.c
- .\Wire.cpp
These files complement each other and open up a platform for nine other functions imperative in I2C controls.
To activate them, you must include the input below at the start of your sketch: #include “Wire. h”.
We’ll explore each of the functions later.
What is I2C?
Two Arduino Boards.
I2C is an acronym for Inter-Integrated Circuit.
It is primarily a communication protocol renowned for applying two main communication wires.
These include:
- SCL (serial clock)- It is vital to synchronous clock communication between the master and the slave device.
- SDA (serial data)- As its name suggests, it is the data exchange mode for the master and the slave device.
The phrase that best describes I2C is ‘acknowledgment-based communication protocol.
This means that the mode requires the real-time interaction of the transmitter and the receiver to facilitate sending and receiving of data.
I2C communication is in two main modes, as we have highlighted above:
- Slave mode
- Master mode
Some of the typical applications of I2C communication modes are as follows:
- In magnetometers and sensor modules
- Accessing real-time clock (RTC)
- Interfacing of external EEPROM memory
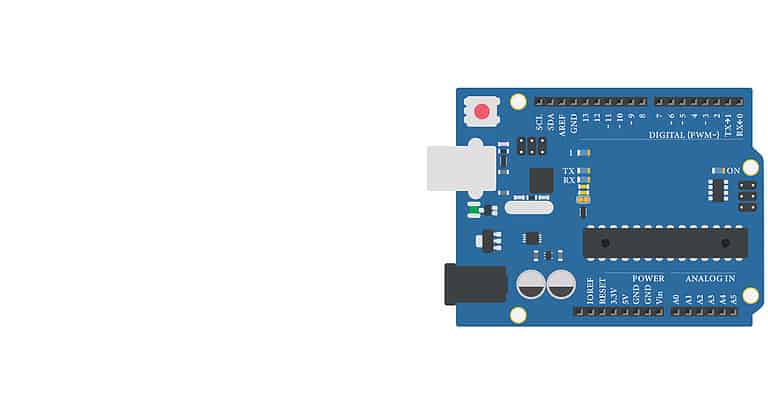
Arduino I2C Pins
Check out the diagram below of an Arduino Uno board showcasing its I2C pins. Notably, you can access the I2C functionality from two positions on the Arduino board.
Also, the rule of thumb is to use a resistor when interfacing your microcontroller with an I2C-enabled device.

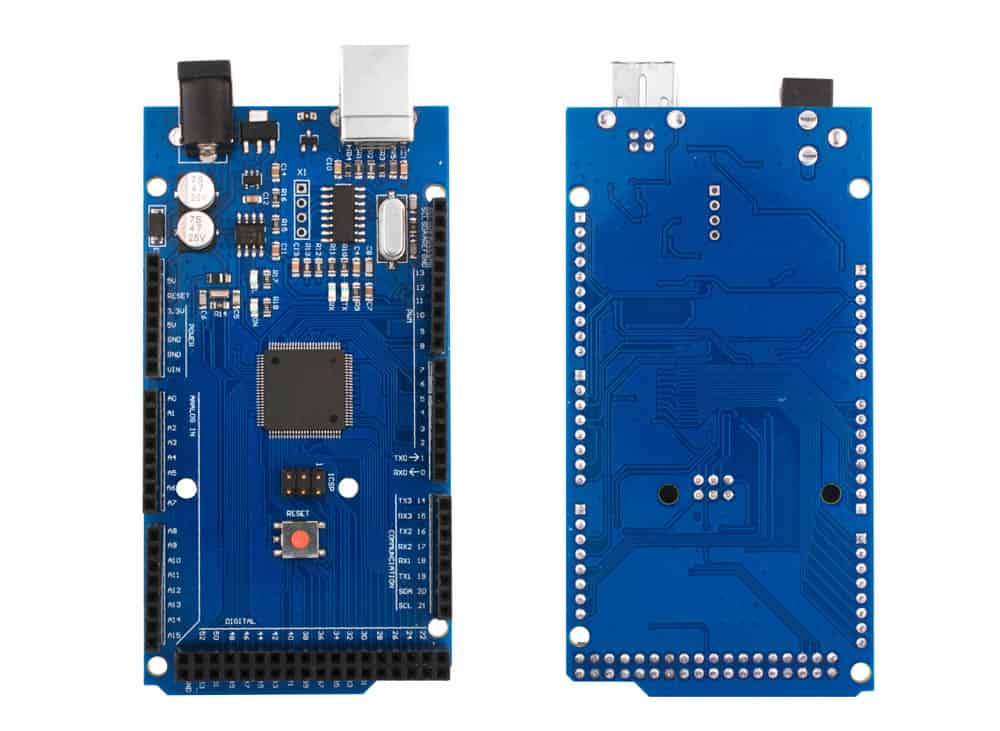
Location of TWI pins in different Arduino Boards
TWI (I2C) pin locations vary from one Arduino board to the other.
Above, we have illustrated their positioning on the Arduino Uno board.
Next, we’ll show their location on other boards.
| Arduino Board | TWI pins positioning |
| Arduino Uno | A4 (SDA), A5 (SCL) |
| Arduino Leonardo | 20 (SDA), 21 (SCL), SDA1, SCL1 |
| Arduino Mega2560 | 20 (SDA), 21 (SCL) |
Arduino Wire Library Functions – Acting as Master
Let’s now look at the 9 Arduino Wire library functions.
Wire.begin()
This command prepares the communication of your external device with your Arduino board by setting up the system for data stream storage.
This happens through the twi_init() function, which has a specific role in controlling the rate of I2C bus communication.
Ensure this command is in your code’s setup, as it’s cardinal to all I2C communications.
Wire.begin(intAddress)
The command is also critical in linking your Arduino board to the I2C bus by acting as the slave component. Its characteristics include:
- It is a preparatory function operating like the slave rather than the master bus in I2C connections
- Also, it has the intAddress part, which is primarily a 7-bit I2C address that you need to assign to your Arduino board.
Wire.beginTransmission(intAddress)
After initializing I2C functionality in the Arduino, this command allows you to input a slave address into the system.
Its other role is introducing the WRITE action, primarily a command that enables the Arduino to follow the slave address.
Wire.write(various options)
This function is imperative in creating an internal buffer containing the data you send to the enslaved person.
When dealing with I2C buses, it’s essential always to use 8-bit data length as this is the default volume your Arduino can handle.
Also notable is the maximum volume per transmission burst is 32 bytes when sending data.
If you’d like to send more, input the stop condition to initiate sending the next data batch.
Wire.endTransmission(boolStop)
At this stage, we have a function that prompts the I2C bus to send out data finally.
During operation, this function primarily provides feedback on the success of the data transmission process by giving back a byte value.
The outputs are as per the table below.
| Output Integer Value | Name of Output | Meaning of Output |
| 0 | Success | Your operation in writing a prompt to the slave device was successful. |
| 1 | DATA EXCEEDS BUFFER LENGTH | You have exceeded the maximum allowed number of bytes per transmission burst. |
| 2 | NACK ON ADDRESS TRANSMIT | One of the causes for this code could be that the slave device you’re sending a signal to is offline. Alternatively, you input the wrong I2C address of the slave component. |
| 3 | NACK ON DATA TRANSMIT | This means that your communication address is okay, but your slave has not issued a response to indicate data reception. |
| 4 | OTHER ERROR | Your I2C write request has been unsuccessful due to other errors. |
Secondly, the function lets you write the stop condition after sending every 32 bytes of a data set.
This is by primarily accepting a boolean value which, in addition to the stop function, also allows you to initiate a repeated start condition for your I2C component.
To realize either, you must enter the following two prompts.
| Enter Boolean Value | Function |
| TRUE | Stop |
| FALSE | Repeated Start |
The display will output some activity at this juncture as this is an executive function.
Wire.requestFrom(intAddress, intLength, boolStop)
In the preceding functions, we have covered the process of sending data.
But how do you request it from the other end?
This is the function we use for this operation. Its primary roles in this process are as follows:
- It structures the address and creates a READ bit to initiate the data request process. The function allows you to request data as per the intLength. This format is imperative in communicating the buffer required with Arduino.
- Also, this function has a boolean stop which allows you to halt the transmission or create a repeated start condition.
Wire.read()
Lastly, this function is critical in reading the buffer by isolating its bytes.
Therefore, it is applicable in arranging your data into arrays and variables.
So important is the function, as in its absence, it’s impossible to receive the data you requested in the above function.
Arduino Wire Library Functions – Acting As an enslaved person
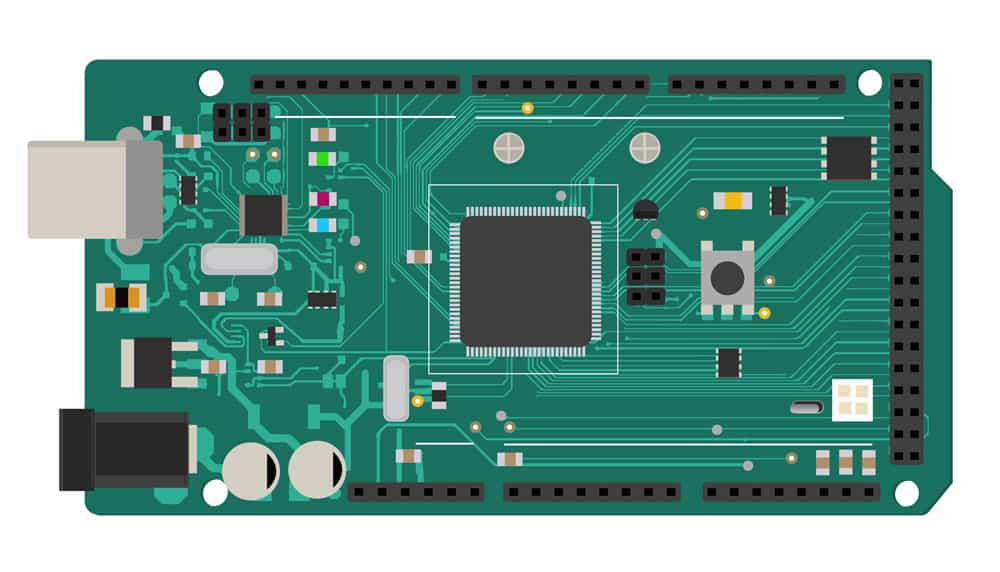
A DIY electronic mega board
How do you interface two Arduinos and initiate their communication via I2C?
Simple- use the Wire.begin(intAddress) function we have highlighted in the above section.
Below, here are other functions you need for the execution of further actions.
Wire.onRequest(FunctionName)
Take your Arduino as the enslaved person. Now think of an external component that you want to read data from the Arduino.
In that case, you need the Wire.onRequest(FunctionName) to initiate this process.
Wire.onReceive(FunctionName)
This is similar to the above function.
The only difference is that while the request function applies when you want the master to read data from the enslaved person, this one is useful when you want to write data.
Also, note that you need to run a code on the Arduino that facilitates the communication process to use either of these functions.
Wire.available()
This function outputs the bytes transmitted to an enslaved person (Arduino) by providing an integer value of the transmitted data bytes.
For instance, say that your Arduino has sent 5 bytes.
The function will show a value of 5 as an indicator of the transferred bytes.
I2C Interfacing Diagram
Below is an illustration of how to interface two Arduino boards using I2C.

I2C Communication between Two Arduino
After the above connections, load the codes below to the enslaver and the enslaved person.
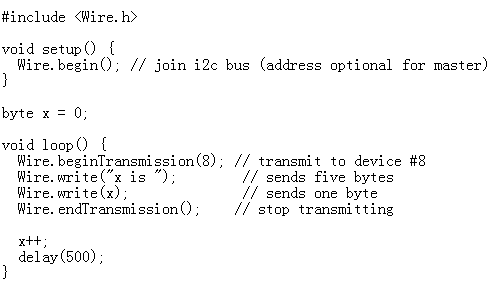
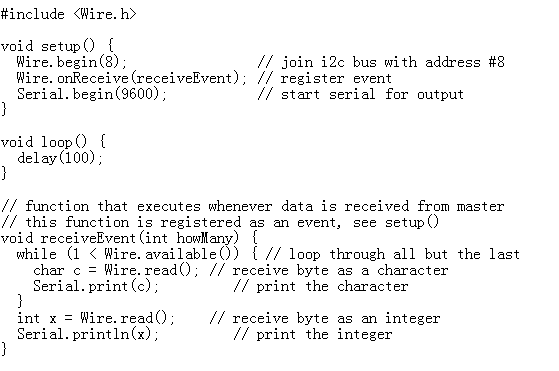
Master Writer code
Slave Receiver
Output at the serial monitor

Two-way communication between two Arduino using I2C
Next, we’ll illustrate a code for I2C communication with Arduino that allows two-way data exchange between the two devices.
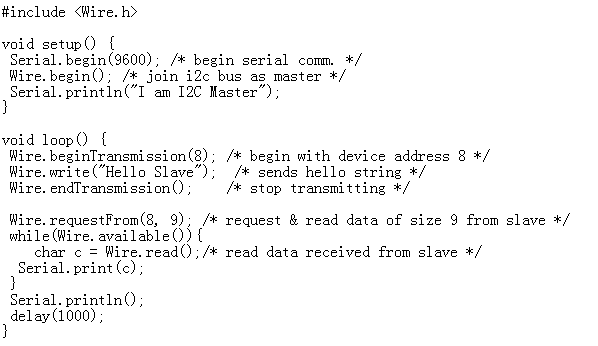
Master Writer Sketch
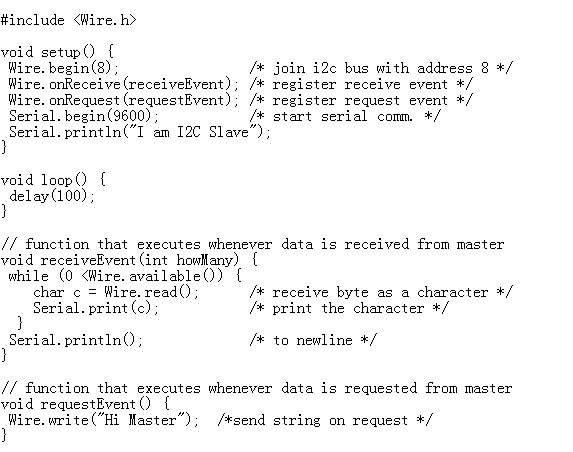
Slave Receiver Sketch
Output at Master Writer

Output at Slave Receiver

Summary
That’s all for today on I2C functions and the role that each plays in your Arduino Board’s communication with an external device.
Also, we have illustrated how to interface two Arduino boards via I2C terminals and initiate communication between them.
Check out the codes we have provided for simple functions and try assembling the setups above.
In case of any query, reach out at any time.